Friday, December 26, 2008

Downtown London Dundas Street, Ontario, Canada

I began doing urban landscapes in London Ontario, the first of which was done in frigid temperatures sometime in 1996. This scene was done some years later, perhaps on the corner of Richmond and Dundas looking east. The city of London was built a hundred years ago or more, and the old fashioned architecture is still seen in the rectangular false-front brick buildings with cast iron exterior fire-escapes and deco trim on the angular rooflines. Building booms in the 60's-80's brought on the steel and concrete sky-scrapers, which are depicted in this work-towering over the old 3-story brick buildings. Where are the people and the cars? The glib answer is that nobody lives in London, or at least bothers to go downtown, but the real answer is that painting people and cars on location is hard! For one thing they move, and for another people and cars have tremendous detail that could take hours to capture. It may have been possible in this painting to put some people walking on the sidewalk by using thick, dark colours which would overlay on the heavy washes that are already there. For some good examples of that see the Montreal Jazz fest paintings posted this summer. 

Downtown London Dundas Street, watercolour 7 x 10" cold press, 2001 (No. 0436)

Thursday, December 25, 2008

Spanky's Fantastic House

For lack of a better name I called this one 'Spanky's Fantastic House' as it was this painting that inspired 'Lab Book #6, Spanky's Fantastic Cathedral". Here, in the distance lies a realistic cathedral reminiscent of the one appearing in LB#6, while in the foreground is a romanesque house and a garden filled with abstract statues. The viewer is drawn into the middle ground by a walkway, where their eye can wander into the flamingo-pink sky streaked with blue cotton-candy clouds (that should be an ice cream flavor?). The house has a heavy dark outline which makes it stand out from the rest of the drawing and gives a surrealism feel to the piece. The dark outline was an innovation I first used in "Birdman" using Chinese black ink, although here the outline is done with paint, and was applied over top of the finished work. Sometimes outlines can be used as an effect, while other times the outlines just need to disappear. In comic book format, or some movies (A Scanner Darkly) outlines are used to create the character, convey emotions, and define the form. In fine art, outlines are often meant to be unseen. Traditional watercolour painting begins with a light pencil drawing, which can be (gently) erased when the paint dries. I prefer to use paint for outlines, using light greys or other neutral colours, which mostly dissapear as you apply washes over top. In the doodle technique I make the initial paint outlines heavier, so they show through in the final work, helping to convey the detail and the energy 

Spanky's Fantastic House, watercolour 16 x 12" hot press, 2003 (No. 1782)

Wednesday, December 24, 2008

London Rooftops, London Ontario, Canada

Reminiscent of the Notre Dame Cathedral painting, this painting captures the detailed architecture of the cathedral in downtown London Ontario. Mind you, the cathedral in London Ontario is not quite as spectacular as the little one in Paris, but it still stands out against the surrounding residential buildings. I had wanted to paint this scene for years but could never find the right angle. Finally one day I was walking around and found a parking lot that had a great site line to the cathedral and so I took a photo, and also did a small location painting to get the colours. This work is a composite of the photo and the location painting.

Painting green is always tricky for the beginner painter, regardless of the medium. In this painting there are several examples of greens, the stairs in the foreground (viridian+french ultramarine+a spot of crimson red), the lawn in front of the house (winsor yellow+viridian+burnt sienna), the roof of the house (emerald green+rose madder genuine), the spires (emerald plus viridian, with some crimson red). Notice how each combination contains some warm colours to balance the green, this is important to achieve realistic greens. Another factor that makes the greens really sing is the overall colour scheme. Here, the reddish bricks of the cathedral provide a good complementary scheme. By the way, you may wonder why I left the ugly telephone wires in; for one thing, it helps fill the composition in the top right sky, but they also give a good sense of the environment....beautiful cathedral in an otherwise.... hansom? city.

11 x 15" hot press. watercolour, 2004

Monday, December 22, 2008

Self Portrait (Selfie)

Self portraits have never really been my thing, and with results like this you can probably see why. The painting was based on a photo I took by holding the camera two feet in front of my face while I made a funny face. The painting captures the shimmering light effect and dark shadows that the flash produced, as well as the warped 'fish eye' from the lens. Does it look like me? Sort of. But it looks more like an intoxicated mannequin of an Irishman stuck in a bad horror movie.... To create realistic skin tones I use a strategy based on some advice from a magazine article written by the master of painting watercolour skin tones, Steve Hanks. His advice was to start with a layer of light blue and purples, and build layers of orange/peach tones on top. In this way, you avoid creating fake looking lobster red or canary yellow skin. Another aspect of keeping the skin tone real is to think about the reflected light, in this work the flash created white highlights on the front, while the dark surroundings (the photo was taken indoors at night) created bluish reflections on my temple.

Self Portrait (Selfie), watercolour 7.5 x11" cold press, 1999 (No. 1492)

Lab Book #14, Part 1: The Lion Tamer (Three Ringed Flying Circus on Wheels)


The concept behind Lab Book #14, is to have a group of paintings centered around the theme of a (surrealistic) circus, with the drawings based on lab notes from 2006-2007. Referring to an earlier painting I did of the same title, "Three Wheeled Flying Circus on Wheels" is the name for the entire group of paintings. In "Pt 1. The Lion Tamer", an alien-like golden beast is under the whip of a new-age character airing out her armpit while a crowd of ghosts looks on. In the background a sports car sits behind a pillar which goes up and off the picture plane. The scene is set inside of a circus tent (a door opens up to the blue sky on the left) that has the appearance of an underground cavern. 

I chose to use hot press paper for this series, just to mix things up a bit and see what is really different about this type of paper. I almost always used cold press, which is rougher and does not absorb paint as readily, which allows you to flow the colours together and creates some random shapes and patterns that often add to the texture and energy of the work. With hot press paper, the paint seems to get absorbed quickly, making it difficult to make colours flow together or create any randomness. Overall, the hot press allows a greater degree of control over what you do, which seems to suit the doodle style quite well. I have finished the drawing part of the next installment, "Pt.2 the Tight Rope Walker", and will start to fill in the colours soon. 

Lab Book #14, Part 1 The Lion Tamer: watercolour 12 x 16", hot press, 2008 (No. 1800)

Thursday, December 18, 2008

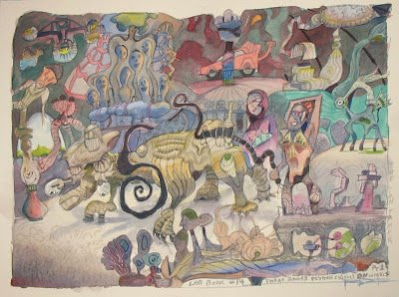
Lab Book #1; C451, Caged Mind

This painting was an early example of the developing doodleism concept. Most of the material came from doodles done in the margins of my undergraduate notes from my chemistry 451 course. Perhaps the very first painting where I used a lab note for a painting was 'Master of the Margin' which was sold at the Artisan's alley. I have (film) photo of it remaining and would like to scan it and post it in the future. In 'Caged Mind' a funny looking man with a goatee (bottom right) looks onwards into a tangle of imagery including a whale, a fish net, a man holding a cage, a trivial pursuit piece....but where's Waldo? Looking back on the doodle pieces I see a slow change in the underlying theme. In 'caged mind', the composition is like an impenetrable net, challenging the viewer to cross it. The doodle paintings has similar themes initially, until 'Lab Book #6 Spanky's fantastic Cathedral' which invited viewers to stroll down the path and enter the abstracted building. In Lab Book #13 (painted in 2007) there is an inviting beach, and in the most recent installment, Lab Book #14, Three Ringed Flying Circus on Wheels (Pt.1), the Lion Tamer, the viewer is placed inside a circus tent witness to some pretty wild entertainment spectacles (to post soon). I plan to make several parts to the Three Ring concept, thus creating a series within the series! In retrospect, I decided to assign this work to the Lab Book Series, giving it Lab Book# 1 designation. 

Lab Book #1; C451 Caged Mind, watercolour 11 x 15", hot press, 2003 (No. 1415)

Wednesday, December 17, 2008

A Man Opens His Umbrella

Sequel to 'A Man Loosing His Umbrella' (posted 5/14/08), this work follows the trials and tribulations of modern man and his umbrella. This time he finds himself on a warm and sunny beach (with all the snow here in Montreal right now I wonder what that feels like) wearing a leather jacket and a flatcap, in the company of a scurrying crab. The umbrella opens up into a flat abstract pattern (a gateway to heaven surrounded by curtains?). The umbrella rod is crooked because I put the rod in last, and found that the handle did not align properly with the umbrella. Kind of like when they finished the railroad and the two sides were off by an inch. From a technical standpoint this was a gut-wrenching painting to create because I had to paint the beach scene first, and then overlay the dark figure of the man, which could not be changed or adjusted due to the dark, staining pigments . Luckily is came out okay the first try, although I had a lot of trouble with the hand and had to do some heavy lifting to correct it. The other notable feature (due to error), is that I originally started the umbrella shape and did not like it, so I turned the painting upside-down and started again. The evidence is seen in the sand on the bottom left where you can still see the faint outline of the original umbrella shape. I liked the star-effect in the sand anyways, so did not try to fix it. 

A Man Opens His Umbrella, watercolour 15 x 22" cold press, 2008 (No. 1937)

Wednesday, December 10, 2008

Science vs. Art

On the topic of balancing art and science, I found this painting, done in 1995 in the basement of the PaperBirch Street house that I was living in for that year, which shows you how I felt about the situation at the time. There are two creepy ghouls facing off against each other, but they are at the same time connected at the waist. Intertwined is a candle, burning at both ends. It is interesting as I make these posts to compare how my style, and ideas have changed over a decade. In escape route (yesterdays post) the colours are lighter in spirit, and the concept of balancing art and science is much less conflict than seen in 'Art vs Science'. Maybe in another decade I should try another version. Also of note, I think this was the first surrealism I ever did. In 'Art vs. Science' I was experimenting with a technique called glazing. The black colour you see in the background is actually three layers of unmixed paint, red, green, an blue. The layers were very bright, and were applied one at a time allowing time to dry. When finished, the colours optically mix, creating the nearly black appearance. The characters were created in a similar way, although by layering orange and green. The bright highlights were created by lifting the dark colours off with a clean damp brush. To allow all that complicated stuff I used a 300 lb press paper which is a really thick paper that does not buckle much, and can hold a lot of paint on its surface.

 Science vs. Art, watercolour 5 x 8" 300lb cold press, 1995 (No. 1686)

Tuesday, December 9, 2008

Escape Route

For me science and art provides a good balance. When I do art I forget about science, and when I do science I doodle all the time which gives me lots of ideas for the art. Okay, I guess it is a bit of a lop-sided balance. In this painting I tried to depict that balance, portraying 'art' as a boardwalk-gallery with plants, and 'science' as the mechanical guts underneath. A staircase connects the two parts. My art dealer at the time (from Artisan's Alley in London Ontario Canada) suggested the title, which is very fitting and indicates that the purpose of the art is to act as an escape. The other notable feature of this painting, is that I do believe it is the first time I painted stained glass (see under the boardwalk towards the right. There is a lot of detail in this painting and yet it all seems to flow together. To help unify the details I made sure that all of the pieces of the 'science' were tinted with purple. In this way the details seem to fit together, and the viewer's eye is more comfortable. Similarly, the art gallery part is tied together with yellow oranges. The cool colours of the science also contrast the warm colors of the art, which further intensifies the idea that the two halves are different. By using colour in this way, you can make the idea of your painting much stronger. 

Escape Route, watercolour 11 x 15" hot press, 2003 (No. 1423)

Wednesday, December 3, 2008

Drumheller Rivers, Alberta, Canada

Here is a painting I did from a photograph my family took while on vacation out west years ago, looking down a valley in Drumheller Alberta, famous for its dinosaur bones and great views. Before I started painting on location (actually doing the painting outdoors while at the scene) I used to practice by painting from photo. When I got some confidence with pieces like this, I finally took to the outdoors sometime in the mid 90's. A couple of other things helped me along the way, one was Zoltan Szabo's book called 'painting little landscapes', and the popular text 'Everything you need to know about watercolour' , and the other helpful thing was getting artist quality windsor newton paints instead of the student quality, which made the colours a lot brighter. I would have to thank my mother for these things, and more so because she enrolled me in a watercolour class in 1989 that kicked off my interest in the first place. When painting from photo there are several things to consider in order to come up with a realistic looking finished product. One thing is that mountains in the distance usually loose their colour in a photo. In reality, a mountain in the distance has a light blue/purple tinge to it. Knowing this, I made sure the painting reflected that, even though the photo did not have the teal tones you see in the final work. I also took some liberty depicting the river, in order to emphasize the clear reflection. To paint the reflection I laid down a blue wash, blended it with clean water while the blue wash was still wet, and let it dry. Then I put on the rest of the stuff using mostly drybrush techniques. 

Drumheller Rivers, watercolour 8 x 10" cold press (300lb), 1993 (No. 0042)

Monday, December 1, 2008

Lab Book #12 Archi-doodle City (W/E), updated photo

Here is the 9th painting in the Lab Book series, which was done in two parts called "Archi-doodle City W" (top panel) and "Archi-doodle City E" (bottom panel). The two sides are part of a single design, which depicts a sprawling European-style city filled with doodle-inspired buildings and strange creatures. The two paintings are complete works on their own, meant to be viewed side by side. The majority of the design came from lab notes, although some of the normal looking building interspersed throughout the painting were taken from a postcard from Lyon France.

This was by far the hardest of the lab book series. I was trying to pack in as many doodles as I could so that I could get to the end of all of the lab notebooks I have, but I could only make it to my lab notes from 2006. And in the last six months or so I have amassed another few books. At any rate, the doodles in this work were densely packed into an intricate, 3-D design with many overlapping and interweaving elements. Somewhere in the middle of filling in the colours and shadows of the west side, I felt great despair that the work would never be finished, but after chipping away at it 20 minutes or n hour at a time, somehow it got done! While painting I listened to some classic/psychedelic rock, using some of the song names and lyrics in the design (see the inscriptions on the roofs on both segments and the train on the east segment).

Lab Book #12 Archi-doodle City (W), 11 x 22", cold press 2008 (No. 2000)

Lab Book #12 Archi-doodle City (E), 11 x 22", cold press 2008 (No. 2001)

Wednesday, November 26, 2008

Elliptical Horizon (Reprise)

I had an inspiration to do a picture with an elliptical horizon which turned into the painting 'Elliptical Horizon' which depicted a kangaroo flying a space craft out of a city over highways that were going nowhere. Although that painting left me satisfied with the result, there was no indication of an elliptical horizon, in fact the horizon had been scrubbed out because it did not actually fit well with the final design. To make a long story short I came up with this painting of the same title with 'reprise' in brackets which clearly does have an elliptical horizon, along with a host of other creative objects strewn throughout. Some of the drawing was taken from lab notes (the phrase DNA damage appears on a sign) however I did not feel the work was strong enough to fit in the lab book series. There are a few colour combinations I have discovered over the years that are very useful. In this work, the sky and most of the grey brickwork was done with rose madder (pink) and emerald green (pale green). The emerald green is very opaque (thick, not transparent) and so it lends a lot of weight and density to anything you mix it with, making it a good colour to use when depicting brick. When diluted with water it gives a gentle, granular look that suits skies very well, in this painting a lot of the sky colours were done with emerald green. The rose madder helps to neutralize the green giving a warm grey. Touching the red/green mix with yellow and a bit more red gives you warm browns that can be used (as seen in the character in the foreground and the sign post). PS, Lab book #12, Archi-doodle City (W/E) is complete, however bad weather precludes a decent photo at this time. I am on the market for a good lamp to allow me to take pictures over the dark and depressing winter months. 

Elliptical Horizon (Reprise), watercolour 10 x 11" cold press, Fall 2008 (No. 1434)

Thursday, November 20, 2008

Busy Noisy Street, Kyoto, Japan

On a conference in 2006 I visited Kyoto, Japan for a week and did many paintings. This painting was done on a busy street near the house I was staying at. Just a few blocks from here was a massive temple. When they say temple they mean a large area covering several acres, with dozens of little temples connected by gardens and walkways. Yet the thing that inspired me most was this noisy, dirty street, imagine a constant stream of honking cars, buses and little white vans going by. I wanted to capture the extraordinary detail of this scene without spending all day painting. I started with a brief outline of the buildings, followed by the basic colour washes that make up the buildings. When dry, I put the details on top. Notice, to paint the tiles on the roofs, I just put a few squiggles, which provide the illusion of tiles without having to spend time painting every tile. Same thing for the bushes in the front, I just put some scribbles on top that look bush-like, without actually painting every leaf. This type of shortcut is especially important for the beginner painter to learn, as it is always tempting to paint or draw every blade of grass when only a few would be enough to give the required effect. 

Busy Noisy Street, Kyoto, Japan, watercolour 6 x 10" cold press, 2006 (No. 1212)

Wednesday, November 19, 2008

Inside Out, Outside In

John Lennon once described Paul McCartney's song Hello Goodbye as '3 minutes of meaningless contradictions'. I can't say that "Inside Out Outside In" was inspired by that song, but it certainly could have been. The idea I was having at the time is that some people feel good inside while things around them are going badly, while others feel bad inside while everything around them is going well. Make sense? In the painting, the good feelings are represented by warm colours and interior space, while the bad feelings are represented by the cold colours and tumultuous outdoor space. I would like to write a bit about fixing mistakes (as this painting had more than a few to fix!). I did not like the length of the limbs on the characters, the legs seemed to short originally. to fix that, I put a dark version of the characters colour on the feet to extend the legs. It is easy to put dark colours on top of light colours. More difficult is to remove dark colours. To do so, one must 'lift' paint from the paper. If you use good quality paper (Arches or Windsor newton) this should be no problem. Get a fresh brush with some clean water on it and dab the area you want to lift. Now dry your brush on a paper towel and lift the water off your mistake spot. Keep working it like that, then dab it a bit with your paper towel. This technique can also be used intentionally to create clouds, tree trunks, eyeballs.

Inside Out, Outside In, watercolour 15 x 22" cold press, 2007 (No. 1951)

Tuesday, November 18, 2008

Blue Flames Consuming the Stylized Image of a Woman

A while ago I posted a small study under the name Blue Flames Consuming the Stylized Image of a Woman (posted June 3, 2008), which was the basis for this full sized version. It is not often that I do a larger work based on a small study but on occasion I have done so (eg. Love v. Jealousy-unposted), and in the future I suppose it would be nice to turn some of the smaller works into larger, more detailed paintings. Doing a repeat also gives you the chance to fix things, for example in the Blue Flames study, the woman has flowing purple sideburns which distract from the woman's neckline, in the larger version the shapes of the sideburns remain but are incorporated into the overall abstraction of shapes rather than part of her figure.

In the full sized version the concept remains the same but the technique is more elaborate. People have asked how the flames were painted. It was a combination of wet in wet techniques and dry brush. When the underlying blue is wet, you can drop in the other darker blues and they kind of diffuse around. Once dry you can then put more on top, and use clean water to feather out the edges, making it look like flowing fire. I also lifted paint off with a clean brush. This painting like all others is by no means perfect (the gallery in London would not take it), the paint is overworked (too many layers, too much brushwork makes a dull grey haze in places), and the composition is far from ideal. I love the concept and the colours, so perhaps I will one day try yet another version. Maybe painting is like research....sometimes you have to repeat stuff over and over till you get it right?

Blue Flames Consuming the Stylized Image of a Woman, watercolour 22 x 30" cold press, 2002 (No. 1991)

Thursday, November 13, 2008

Mount Tremblant

This painting was done up at Mount Tremblant in the little town they built near the mountain, which seems to be modeled after disney land as everything looks kind of fake and you half expect to see mickey mouse around the corner. At any rate the Beaver Tales were good. As the picture indicates it was fall when we were up there, a nice sunny day when the leaves were really shining with reds and greens. Painting fall colours is always tricky, the temptation is to use strong reds and oranges right from the tube, but this will always look fake (ok, maybe a fake-look would have been accurate given that everything in the town looked like it came out of a tube). The truth about fall colours is that they are all based on green and brown...as a leaf looses its green pigment in the fall it reveals the reds and yellows that were always there, but were masked by the green. To mix these colours on the palette I start with a very light green and add in a bit of red and yellow. For the greener trees I start with a darker, heavier green and just touch it up with some red and yellow. Practice mixing orange and green for awhile and you will get realistic looking colours for fall paintings. 

Mount Tremblant Ugly Fall Colours, 5 x 9" cold press paper, 2008

Monday, November 10, 2008

Still Magestic

Often I find doodles in my notebooks that can stand alone as their own painting. In this example, Still Magestic, a butterfly with stained-glass wings is bolted to the ground, unable to fly away. In the foreground is a poppy field (fitting for the day of this blog post), which was inspired by Monet's masterpiece The Poppyfield Near Argenteuil , a small oil painting I saw at Musee D'Orsay in Paris, and I once made a copy of using acrylic paint (which hangs in my parent's basement). The message of the painting is simple, sometimes we want to fly (or our ideas want to fly) and yet we are tethered by constraints of reality (or our bosses). The sky technique used in this painting is a little tricky but very effective if mastered. I start with a pale yellow/orange layer of paint, and let it get about half dry...which means not to wet, not too dry. Then I drop in the clouds, a micture of ceurelian blue (an opaque sky-blue) with touches of yellow and alzarian crimson (a red). If the initial layer moisture is judged correctly the clouds keep a nice tight form, with fuzzy edges. If the layer was too wet the cloud shapes run into each other, if it is too dry the edges are too hard. See technology@pull for a similar example. 

Still Majestic, watercolour 10 x 15" cold press, 2008 (No. 1391)

Friday, November 7, 2008

The Juggler

Here is painting dating back to when I really began painting in the surrealism style after a long period of painting landscapes and florals. The story behind this painting is how one can go through emotionally difficult things, and no matter how hard they are we keep going, and also keep trying. In the painting, the audience looks on as a clown with a porcelain (glass) head is juggling hammers. On the stage lies shattered remains from past performances, and behind the curtain is a shelf of new glass heads. There is also a platform with soft bean-bags. (but the clown thinks that juggling hammers is way more impressive?) The juggler contains rich, luminous reds that were achieved through optical mixing techniques. To do this, the entire work was first done using only blue paint, and when that dried, several layers of reds were applied on top. Now when one looks at the painting, the reflected light has to pass through both layers of paint which optically mixes to become a shimmering, luminous magenta. Had the red and blue been mixed on the palette, it would instead produce a dull, flat looking purple. 

The Juggler, watercolour 11 x 14" hot press, 2001 (No. 1334)

Thursday, November 6, 2008

Lab Book #11: The Legendary Isle of Sixe

The lab Book series has progressed from relatively flat (2D) imagery in Lab Book 4, Finding Space, towards more of a 3D illusion as seen in the latest addition lab Book 11, The legendary Isle of Sixe. In the foreground there are trees and beasts and sharp colour contrasts, the middle to backgrounds are populated with buildings and totems and rolling hills that fade to blue in th distance. At the top of the picture are the treetops, alive with birds and primates, which also draw your eye back down to the foreground completing the illusion of depth. Creating depth in a picture can be done in several ways. One way is to make colours are always brighter in the foreground, as seen in this work there are many bright primary reds yellows and blues, while in the distance (the top of the painting) these colours are less intense. In some cases I put very bright colours in the distance (find the eye on the coast near the top right of the picture) just to make things pop out and surprise you. I also used the birds tail in the treetops as a contrast element: the tail has one very bright red feather that makes the surrounding blue look very dull, which makes the depth illusion all the better. 

Lab Book #11: The Legendary Isle of Sixe, watercolour 22 x 30" cold press paper, 2008 (No. 1999)

Wednesday, November 5, 2008

Lab Book#13: Catching Rays

This painting was not originally intended to be a in the Lab Book series, however the entire composition came from the doodles I made on a (long and often dull) science conference I attended in Nagoya Japan, 2006. I felt that it could be included it in the series at number 13, which also avoids the problem of having to paint a #13, which would be terribly unlucky. For those following the series, I will be posting Lab Book#11 The Legendary Isle of Sixe shortly, which was completed last month. I am currently working on Lab Book #12, Archi-doodle City (W/E). which is done on two pieces of paper 15x30inch intended to be displayed beside each other. I used a bit of a different technique on this one, the colourful wash that makes the sunset was applied first, and the doodle details were overlayed after it had dried. The same was done for the ocean. To make the multi-colour sunset wash was a bit tricky. Each colour in the sunset must be of equal value (by value we mean the level of lightness/darkness), and the consistency of the water must be nearly identical or else they wash each other out. Most of all, the timing has so be carefully measured, so that each colour can be just moist enough to blend into the next colour. It takes a bit of getting used to, but the results are very satisfying. 

Lab Book#13: Catching Rays, watercolour 11 x 16 cold press, 2007 (No. 1773)

Tuesday, November 4, 2008

Totems


Here is a small abstract (surrealism) done a number of years ago when I was painting in the basement apartment in London Ontario called Bayfield Hall. On the horizon stands a giant staute (totem) of two people connected like Siamese twins, while in the middle and foreground stands oddly shaped green structures. Is the object on the left of the painting a rearing cobra? To complete the illusion of size, small trees are placed around the totems to give the viewer a sense of scale. An important concept when designing a painting in any style is 'negative space'. Now why should anything negative be good for a painting? The negative space refers to the area around your center of interest. In this case the blue sky provides the negative space, surrounding the totems. Making the negative space into interesting shapes is a very powerful way to give your designs (compositions) lots of energy. Look at the actual shapes that the blue sky makes. Those shapes are curvy, angled, flowing...interesting to look at. Imagine the totems were just straight poles, the sky would be a bunch of boring rectangles. So try to think about the space around your objects and make it as interesting as possible. 

Totems, watercolour 6 x 11" cold press paper. 2001 (No. 1583)

Friday, October 17, 2008

Salamanca Old Cathedral, Spain

At this point in the Spain trip I my confidence was such that I was not afraid to take on a scene with a lot of detail. This was perhaps one of the most elaborate cathedrals I had encountered, with the sun pouring down on its reflective dome, the rich shadows and intricate detailing on the spires, and the beautiful, open square in front of the cathedral, laid with interlocking brick and ornate lamp posts. Somehow all that is captured on a small painting in about an hour or so, just missing the crowds of people that were actually there taking pictures and asking me if I was Spanish or not (I was wearing plaid and a baseball cap at the time...). To paint this work I sat in the sun. It is important to have real sunlight on the paper in order to accurately judge the colours and values you are applying to the work. If you sit in shadow the colours end up looking washed out and the values kind of monotone. In Spain it was so hot that sometimes I had to sit in the shade anyways, counting on the strong light to come through. Notice that in the shadowed face of the cathedral, there are several details (windows etc.) that are done with simple , dark brushwork. Keeping it simple is important for a small painting like this, to keep it fresh and easy to look at. 

Salamanca Old Cathedral, watercolour, 5 x 7" cold press, June 1998 (No. 0955)

Wednesday, October 15, 2008

San Sebastian (Donostia) Beach House

On the train to San Sebastian I asked the train man if I was headed in the right direction and he corrected me saying that I was in fact heading to Donostia. Confused I sat on the train and waited, and finally arrived in the right place. It turned out that the name Donostia is the Basque version of San Sebastian, the Basque being a distinct cultural entity in Northern Spain. At any rate, it is a beautiful place to visit, and I spent two weeks there on the beach and enjoying the good company and great painting. This painting was done on the beach, facing up towards the town. The typical white-painted lamp posts and red-tiled roofs are seen in the picture, and of course some garbage bins in the middle ground. I often like to paint garbage cans and especially orange pilons, alas there were no pilons on the beach that day. The white lamp post is actually just the white paper showing through. To create the shape of the lamp post I have to paint around it with the background elements (the house, the bushes, the sky, etc.). It takes a bit of practice to paint around an object, you need to imagine the negative space before you start the painting. In the case of the park bench you see in the middle ground, I leave a rectangle of white, and overlay a few narrow strips of green that match the colour of the bushes, thus creating the illusion of white-boards with space between them. The clouds were painted in the same way...by putting blue paint around a negative space, just had to keep the spot wet to have the fuzzy edges. 

 San Sebastian, Ondarreta Beach Lamp, watercolour 5 x 7" cold press, May 1998 (No. 0847)

Tuesday, October 14, 2008

Meet Me Tonight

In a few cases people have asked me about certain elements in my paintings. For example, with "in Touch" there is an abstract form in the bottom left that does not physically connect with the main subjects (the floating heads). In 'Meet me tonight' there is also a disjointed random object in the bottom right portion of the painting that does not seem to connect with the rest of the painting. The reason such things exist is that these painting started as just a blank piece of paper, and I did not have any notion of what to paint. I start (usually in a corner where it does not matter) with random doodles until some kind of idea forms in my head (and on the page). You may notice that nearly every painting I do has a white border around it. I used to paint right to the edge of the paper, but the people who frame the work complained that the mat would never fit properly. So I started leaving more space around the painting, and found that the edge of the painting could actually contribute to the overall composition. In this painting, notice that the edge of the sky is more loose and flows out almost off the paper, while the ground is a straight line. In this way, the elements gain some energy from their edges....the sky is more free and open while the ground is more solid and closed. 

 Meet Me Tonight, watercolour 22 x 15" cold press, 2006 (No. 1764)

Thursday, October 9, 2008

University of Western, Snowy Stadium Scoreboard, London, Ontario

This painting was done years ago on the campus of the University of Western Ontario in London Ontario, Canada. It was the middle of winter and yes, I went out and painted on location, the snow was two feet deep (half a meter), I remember scraping the snow off the bleachers to get a place to sit. The thing that attracted me to this scene was the clear white snow in the foreground, the geometric patterns of the scoreboard and roof-lines, and the flowing trees in the background. You can also see the top of Middlesex College, a motif found in many of the London paintings. Painting on location you will see more colour than a camera (even digital) will pick up, especially in the shadows. In this painting, the shadow being cast by the scoreboard is filled with blue light from the sky. Since the material underneath the shadow is white, you are seeing the 'pure' effect from the blue sky. When such a shadow is cast on a coloured surface (green grass for ex.), there is still the same amount of blue, it is just masked by the underlying colours. Your eye will become trained to pick up these subtle hues in the shadows, and also, having an understanding of the concept of reflected light will allow you to make more realistic shadows in abstract work as well, where there is no nature to guide you. 

 Snowy Stadium Scoreboard, watercolour 5 x 7" cold press, winter 1997 (No. 0460)

Wednesday, October 8, 2008

Gray Zone

Often in the pages of my lab books there are one or two doodles that make good paintings. The first doodle I turned into a painting was "Master of the Margin" done some time between 1998-2000, the original was sold out of the gallery in London Ontario. This image was also used in the recent painting Lab Book #10, Apple eye, violet sky....it appears in the upper right portion of that painting. Here the mermaid character is featured in the center of the image, the symmetry broken by the curving background and curvacious figure of the mermaid. As the name implies this painting is based on shades of gray. I actually just poured water on my palette and mixed up a bunch of colours randomly until a grey mud came out. I then deposited the mus onto the paper and before it dried, I dropped in bright, pure colours to create the greens in the grass(and blue shadow by the mermaid), the highlights on the horizon, and the graded-yellows in the swooping cloud/ceiling. The pinks you see in the cloud/ceiling were then applied after everything dried by applying a thin layer of rose madder. The blue/red/black combination around the mermaids head is the darkest and brightest part of the work, drawing your eyes to that particular area.

Gray Zone, watercolour 10 x 11" cold press, fall 2008 (No. 1436)

Monday, October 6, 2008

Lab Book #10: Apple Eye, Violet Sky

This is the sixth painting in the Lab Book Series, entitled Apple Eye, Violet Sky; Lab Book #10. The naming very confusing of course, as there is no actual Lab Book 1-3. I am planning on doing Lab Books 1-3 in the future, when the special-effects technology gets better (sorry, bad 'Star-Wars' inside joke-they made the last three first, and the first three last). In Lab Book #10, an apple was created out of many doodles that were grouped together. After grouping the doodles for the apple, they were glazed with a purple-blue colour, followed by a layer of warm red tones. In one section of the apple there was no blue-underpainting, so the red really stands out. Also, the label on the apple was left as white space until it was finally painted. Finally, I applied darker reds and blues for the shadows in the apple, which bring out the individual doodles. 

Lab Book #10 (Apple Eye, Violet Sky), watercolour 22 x 15" cold press, summer 2008 (No. 1963)

Wednesday, October 1, 2008

 Orange and Olive Fall Reflections, London, Ontario

This is another fall-colour scene, done in London Ontario. At the top you see the riverbank with the bottom of the trees and the rocks at the edge of the water, and below, the majority of the painting depicts the murky waters reflecting the reds and yellows of the trees. As in the last blog entry, this painting is a good example of juxtaposition of colours to achieve the illusion of brightness. The reds and yellows in the water are actually quite brown, if you saw them on a white background they would be dark and not colourful. However, the surrounding brown-green of the murky river water is darker, and is also a neutralized version of the same red and yellow. As a result, the actual red and yellow are made to look brighter and lighter. This is how to create realistic looking bright colours. 

 Orange and Olive Fall Reflections, watercolour 5 x 7" cold press, 2004 (No. 0684)

Fall Car, Bolton, Ontario (updated scan)

As fall approaches I though I would post a few fall paintings from the archives. This painting was done just north of Bolton Ontario where I grew up for a time and my parents still live. The backroads, mostly gravel still, criss-cross farm country-vast valleys of crops and pasture, and rolling hills in the distance. In the fall the trees are afire with red orange and yellows. This car was for sale, it was in mint condition. I liked the way the light blue paint-job contrasted the orange trees. In the fall, an original painting can be much better that a camera for capturing colours. A camera does not pick up all of the subtle colours and contrasts that you can see with the naked eye. Actually painting fall colours is always tricky. The temptation is to use bright red and yellow directly from the tube, but this leaves the impression of a false-colour. The best way to go is to use a red with touches of green and blue in it, make the red kind of earthy, an then place it next to a green or brown. In this way the red becomes bright by comparison. 

Powder Blue Car, watercolour 5x7" cold press, 1999 (No. 0360)

Tuesday, September 16, 2008

The End of Colour; Lab Book #9

I recently did a few new lab book paintings, this one, and Lab Book #10 which I will post soon, you can find it on the main website. Lab Book #11 is also in progress back at the studio. The new set of Lab Book paintings, starting with #8, actually come from small note pads I carry around at work. Usually at boring meetings and seminars I do my best doodling. So the number system does not refer to a particular lab book, just a series of paintings. In this edition, 'The End of Colour", a submarine explores the depths of the ocean sharing space with scary and beautiful sea creatures. On the surface there is a colouful sky and rippling waves. The title refers to the fact that at the bottom of the ocean there is not much colour... the artificial lights of the sub reveal what colour there is. The painting was also named as it was because I was running out of paint and did not have certain colours available (virdian green). Viridian green is a very powerful green that looks like emeralds or green lolipop. To replace it, I used combinations of ultramarine blue and lemon or windsor yellow. This combination comes out a little more earthy looking, which suited the overall feel of this painting. I was also missing alizarin crimson, instead using permanent rose...it was used liberally in the sky. Not having the green and red mentioned above, I also could not make black, which again suited the scheme of this painting which was very pastel-like. It is a good idea to paint without one of your favorite colours now and then, you never know what you may learn. cold press paper, 

The End of Colour; Lab Book #9, watercolour 22 x 30", fall 2008 (No. 1998a)

Friday, September 12, 2008

In Touch

This painting was done in the summer (2008) inspired partly by Dali and the melting clocks, and a little bit by the Group of Seven, a Canadian painting group from the early 20th century that focused on painting the Canadian wilderness. I don't suppose the group of seven saw arms in the trees and glass heads in the sky, but perhaps Dali did at times. The deliberate brush strokes loaded with colour (that are seen in the water) are a characteristic of the G of 7 painter Tom Thomson, and also of the impressionist Monet. I try to duplicate their effects with watercolour (they were oil painters). I start with a luminous layer of paint that reflects the tones from the sky, and then overlay with darker colours that come from the dark parts of the sky. 10x11 inch, cold press paper, 

In Touch, watercolour 10 x 11" cold press, 2008 (No. 1406)

Tuesday, September 9, 2008

Stained Glass Set in a Bearskin Wall

Somewhere along the way I developed a love of painting stained glass. Perhaps the first example was 'Escape Route' where you will find a stained glass window tucked in below all of the machines. Here, the stained glass is set in a wall of fur, with some abstract twisty things in the foreground. There are also floating disks inviting the viewer to walk up to the wall and touch it. The scene depicted in the stained glass was taken from a postcard I got in Barbados I think, it was originally a painting which I stylized in stained glass. To paint stained glass I start by a light outline of where the lines will be. Then I fill in each section with a different colour, careful not to let the colours run together, When fully dry, I overlay a dark colour (alzarian+viridian) on the edges of the colour blocks. It is important to keep the colour values (lightness or darkness) similar, so the window appears illuminated. To finish the illusion, I try to put some reflected colours in the window-sill around the glass. You can see a bit of colour mixed into the grey of the windowsill in this painting. 


Stained Glass Set in a Bearskin Wall, 11 x 15", cold press, watercolour 2002 (No. 1749)

Thursday, September 4, 2008

Little Blue People

Little blue people, they are out there, looking up at us from the stars, across the universe and into our eyes, controlling our minds...do you get all that from the painting? Some of the little blue people are happy, others look kind of worried, maybe they are small like ants and they are staring at the sole of your shoe as it comes down on them. Why don't they run away? The little blue people were painted first directly on the white paper by making a blob of water with the brush, letting it dry slightly, and then outlining the damp blob with concentrated blue paint (antwerp blue). When it was dry the orange background was put in, and then the that dried and the dark arms, legs and face features were applied. This was done on very thin paper, I was intending to test a technique for a larger work, but decided in the last minute to bring the little blue people to earth.

Little Blue People, watercolour 9 x 12" watercolour paper, 2004 (No. 1358)

Tuesday, September 2, 2008

CTLA-4

This tiny painting was done towards the end of my graduate studies in London Ontario. The painting depicts a metallic butterfly with segmented antenna and a very mechanical background. Where did I get the idea? My graduate project was involving a molecule called "CTLA-4" which is an acronym for something long and complicated. I was studying a phenomenon called 'long chain sugar addition', trying to understand how such a modification affected CTLA-4. Anyways, a colleague of mine had an old frame and wanted me to paint something to fill it in. The butterfly represents CTLA-4, and the antenna represent the sugar additions. How do you paint a small painting? Use little brushes. In fact, I use little brushes all the time, even in 'lab book #7, construction at site 22' which is a gigantic painting. I also hunch over and stare at the painting from a foot away, which is bad for my eyes and back I suppose but I can see the painting really close up. Some artists have even been known to use a microscope (see Chuck Close), but this is a little extreme for me, and I spend enough time at work looking in microscopes. cold press paper, 

CTLA-4, watercolour 3 x 3", 2004 (No. 1928)

Friday, August 15, 2008

Sun, Earth, Moon

I did this painting years ago, perhaps 1999 when I was living in the basement of a shared student house in London Ontario. The theme of the painting is 'flying and floating', most of the elements are things found in the sky. In the background there is an Egyptian god of the sky in the purple tablet at the top. The creature with the sun-head is kind of a mix between a bird and an octopus, with a skeletal neck. The belly of the creature opens up and shows the earth and the moon on a background of stars. I like the different layers in this painting, the sky and the starry night and the sun all give this sensation of visual uncertainty. To paint the stars I took the hard road. Using a very dark shade (mixture of crimson red, deep blue, and sap green) I paint the night sky, leaving blank paper for the stars. At the end I put light washes of green and red on the starts to make them shimmer. The easy way is to use rubber masking fluid (see cosmetic makeup), then you just paint the sky on top and use an eraser to reveal the stars. The way I did it here, you have to control the brush extremely well to maintain the small star shapes. It is good practice to do this at least once! 

Sun, Earth, Moon, watercolour 15 x 22" cold press, 1999 (No. 1934)

Tuesday, July 15, 2008

Biere et Vin Froid, St. Joseph St., Montreal, Canada

Here is a small painting done on location in the 'Mile End' area of Montreal. Little hole-in-the-wall depanneurs like this one can be found all over the town. A depanneur is a french equivalent of a convenience store, the biggest difference being the sale of liquor. Many of these stores advertise 'biere et vin froid' which means 'cold beer and wine', you can see posters in the window to this effect. Over top of the door is a porch from a second story apartment with a bike locked on the fence. The blend between commercial space and residential is what inspired me to paint this.


There is a strong shadow being cast from the porch onto the front of the store. Painting shadows like this is not too difficult if you understand the principle of a shadow. In the absence of direct sunlight, a shadow looses intensity of colour and picks up ambient light from the sky and from reflected sources. In this case the sidewalk is reflecting light onto the shadowed wall creating a luminous shadow. A similar effect was described in the blog entry for Cordoba, Spain. To paint this shadow, I use a multi layer approach. First I put down a pale wash for the bricks and the store front. Then I add the bluish/purple mix for the shadow on top of the the first wash. To the rest of the non-shadow wall I add a thin layer of bright orange to give the bricks that glowing luminosity. Finally, I add details on top like bricks.

Biere et Vin Froid, st Joseph St., 5 x 7.5" cold press paper, summer 2008 (No. 1078)

Friday, July 11, 2008

Higher Ground

Here is an abstract painting I did recently called Higher Ground. I was inspired by a chinese painting I bought years ago, it depicted a tree branch on the top of the picture, with a bird jumping off the branch. The bottom part of the chinese painting was completely blank paper, but when I first walked by the painting in the gallery I could have sworn that I saw a field of farms and a mountain in the background. When I came back to look at the painting for a second time it sunk in that the painting was actually blank on the bottom and the mountains I saw were an optical illusion, a product of my imagination. In the painting shown here, the entire top half of the painting is blank (except for the upper tree branches), but you could almost imagine that it is a cloudy sky, or that a bird is about to fly by.

Now I will explain how to paint a blank canvas...just kidding, you leave it blank. But seriously, it was important to make the edges of the other painting elements blend into the blankness. For example, there is a thin blue wash at the bottom of the painting, which I blended using a brush full of clean water. The trick is to use just the right amount of water to blend the edge of your wash....not enough and it looks too choppy, and too much the paint will continue to dissolve into your blend and dry with a hard edge. It's a matter of practice to get it right, once mastered the edge-blending is a powerful tool that allows you to create amazing effects and also fix mistakes. I should write a section on fixing mistakes soon! (the best advice with watercolour is: don't make mistakes).

Higher Ground, watercolour 10 x 11" cold press, spring 2008 (No. 1449)

Thursday, July 10, 2008

Jazz Fest, Mountain View, Montreal, Canada

The last painting of the day is a scene looking north towards Mount Royal, you can see the cross and the radio tower in the distance. The sun was about to set, but the jazz fest was still in full swing. One of the jazz fest logos, the 'hep cat' can be seen in the middle ground, just over the young couple holding hands. The red structure to the right of the picture is the main building in the place de arts esplanade, the same building that can be seen in previous jazz painting 'jazz fest parade'.

The theme of the jazz fest paintings was the blend of the city of Montreal, the festival itself, and the massive crowds. Each of the three in the collection contain a backdrop of the city-scape, and elements of the festival and the crowd merged in to the landscape. I have always tried to maintain a theme with my paintings, whether a painting was of an old couch discarded on the sidewalk or a giant cathedral in Spain, the inspiration and the message was the most important aspect.

Jazz Fest, Mountain View, watercolour 5 x 7" cold press, summer 2008 (No. 1086)

Wednesday, July 9, 2008

Jazz Festival Parade, Montreal, Canada


The second painting I did at the jazz festival was done in a very exciting circumstance. There was a bizarre parade going down St. Catherines, the parade included a marching band, flag bearers, a feathered woman on stilts, a giant alligator and some dude wearing a candy-red jester hat. Meanwhile, thousands of people lined the street trying to catch a glimpse of the action. At first I could not find a good place to sit, as the standing crowd was blocking the view. So I went up the street and found a nice place to sit and began to paint the crowd and the UQAM building as seen in the back-ground of the picture.

When the parade got there I quickly sketched it in, and a woman pusing a hot-dog cart went by, which I also sketched in. The parade came and went pretty quick so I worked fast and filled in details from memory. All of that energy from the surrounding translated into an exciting piece of artwork filled with vibrant colours and flowing lines. You can almost hear the tuba over the noise of the crowd, and smell the hotdogs and cheap beer.

Jazz Festival Parade, watercolour 5x7 cold press, summer 2008 (No. 1085)

Tuesday, July 8, 2008

Jazz Festival Main Stage, Montreal, Quebec


Recently Montreal hosted the world famous jazz festival situated in the heart of downtown Montreal. I spent an afternoon there painting pictures and enjoying the inspiration provided by the jazz tunes floating through the air. In the painting you see the Montreal skyline looking east, the alcove in the church wall contains a statue. In the middle-ground, a portion of the main stage is seen, the purple square is one of the video screens which broadcasts the scene from the stage. Of course, the crowds of people are seen milling about, waiting for the next show to start.

I start this painting with a rough outline of the skyline and the stage. I leave the part where the people go blank at first. The people are quick sketches of actual people I saw, but for the most part I fill in the details of the crowd from memory. People just wont stand still long enough for you to catch them. I had an offer to buy this painting from a festival goer, but I decided not to sell. It is always difficult to sell small paintings like this because people figure that it is like a small postcard and should only cost 5$ or something, so what is the point I figure. However, once in Stratford Ontario a fellow really wanted a painting I had done, and made me an offer I couldn't refuse.

Jazz Festival Main Stage, watercolour 5 x 7" cold press, summer 2008 (No. 1084)

Monday, July 7, 2008

Chicken #5

This painting was done during christmas break 2006 at my parents place north of Toronto. For those of you who have not been to Ontario, I should say that giant chicken-shaped buildings are very common... most people live in such structures and commute to work in flying shoe-cards piloted by roosters. OK, I may have imagined a few things about Toronto, but people there do commute a lot.

The painting was built up from loose lines and flowing washes, and finishing with detailed brish work on the top. The brush work creates the illusion of size (see the small people at the foot of the chicken building and the windows). Also, creating the sense of space is a diffuse atmospheric lighting that makes the background trees blueish, and the head of the chicken building dissolve into the sky. The intense colours of the flying vehicle also create the sense of depth by contrasting against the chalky pastels of the background and middle ground.

Chicken #5, watercolour 10 x 11" cold press, winter 2006 (No. 1371)

Thursday, June 26, 2008

The Basin of Culture, Chambly, Quebec


I recently visited Chambly Quebec and was lucky to find a real basin of culture. At least, the signs posted on the street said that we were in the basin of culture. After awhile in the small town just 30 minutes south of Montreal, I started to wonder where the actual 'basin of culture' was to be found. The tourist information did not help. At least there was a bar in the town, and they served cold Molson Export (but no blanche de chambly, to my shagrin).

Painting the masts of the ships required a lot of careful planning because the white of the mast is actually the blank paper showing through. All of the stuff around the ship masts (the lake the trees the mountain) had to stop at the edge. This requires a bit of practice, otherwise the edges look false, and the objects in the background (in this case the mountain) looks choppy. The deck also had to be painted in the same way, that is, leaving the shape of the deck blank when the lake was painted. Of course, if you wanted to cheat you could use white paint and simply apply it as a layer on top, but you can not do this in traditional watercolour, or else the 'basin of culture police' come out and arrest you.

watercolour 5x7" cold press, summer 2008

Thursday, June 19, 2008

What Does it Mean

This painting makes a play on all different sources of light. The city in the background is illuminated in a warm red, the trees in the middleground lit by the cool blue moon light, and the sign in the front basking in the yellow light from the lantern. The pond in the middle reflects all three light sources. As for the question posed by the painting's title (What Does it Mean?), the sign shows symbols that I copied off a bottle of chinese black ink, and incidentally, I do not know what it means.

Producing these lighting-effects is complicated, but essential for art that really glows. To create the illuminated moon, I start by putting down a pale blue wash with a circle in the middle left without paint (the moon). To this wash, I outline the moon with a slightly darker blue tone to give the moon the illusion of brightness. Then I surround the pale blue wash with the darker blue/purple of the sky. The red colour of the city was actually placed first, and the dark sky was painted over top, creating the shape of the city line, and also providing a red glow in the sky.

What Does it Mean, watercolour 5.5 x 7.5" cold press, 2008 (No. 1721)

Tuesday, June 17, 2008

Mellow Yellow (out of yellow)


This scene came from my imagination, another painting where I sat down in front of a blank piece of paper and let the brush do the talking. Of course I could come up with an explanation for the work...the painting represents the downfall of the sport-utility-vehicle in the modern age where the oil economy (represented by the evil totem in the background) rules our behavior (represented by the fountain and the sidewalk in the foreground). Maybe I should be an art critic.

The painting has a really smooth look to it. This was achieved by keeping all of the paint fairly moist, and working fast. The entire painting was finished in one sitting, so none of the paint had a chance to dry (dry paint ends up having sharp edges). Also, I was literally out of yellow paint at the time, so the only source of warm colours was burnt sienna and red. Of course, the lack of yellow represents the decline of gasoline in the modern age.

Mellow Yellow (out of yellow), watercolour 11 x 10" cold press, 2008 (No. 1448)

Thursday, June 12, 2008

Tadoussac, Quebec, Canada

At the junction of the St. Lawrence and the Saguenay rivers, Tadoussac is a small town famous for whale watching. The painting shows a hotel down near the beach which has been there in various forms for decades. The time of year was fall, you can see some of the leaves have changed to orange. In the distance I drew in a whale (the small black fleck towards the left). Although the whale was not actually there, one can see many whales from the beach, and even more on the many cruises available.

This painting has a lot of 'depth' to it, which is to say the illusion of distance. One way to create the illusion of distance is to put warm colours in the foreground (the bottom of the painting), and cooler colours in the background. You see that the warmest red is right at the bottom (left) of the hotel roof. Also, on the bottom right I put in a warm brown wash in the trees. Nearly every landscape I do has a splash of red at the bottom to help with the illusion of depth.

Tadoussac Red Roofs and Whale, 5 x 7" cold press paper, fall 2007 (No. 1148)

Monday, June 9, 2008

L'Université du Québec à Montréal (UQAM)

Not too long from now the jazz festival begins in Montreal (late June) around the location where this painting was done. The oval building is L'Université du Québec à Montréal (UQAM) downtown location, and to the left most part of the painting you can see the edge of the sloped roof of the place d'arts building where most of the international jazz fest main events happen. Perhaps when the jazz fest begins I will have the chance to do some painting of the crowds of people and the jazz musicians.

A shadow is made up of two things: the colour of the object itself, and the reflected colours of the surroundings. In this case the object (the UQAM building) is a pale orange, and the surrounding (the sky) is blue. The shadow on the building was a combination of cerulean blue (an opaque sky blue) and rose madder (light pink) and a pale orange colour matching the colour of the building. The same thing applies to the shadows you see in the trees, which are a dark blue version of the warm greens found in the leaves.


L'Université du Québec à Montréal (UQAM), watercolour 5 x 7" cold press, summer 2007 (No. 1095)

Thursday, June 5, 2008

Alicante, Spain

This painting was done from high atop a castle on top of a mountain in Alicante Spain
which is on the Mediterranean coast just south of Barcelona. The walk up to the castle was very beautiful, and I remember a cyclist who was peddling up the really steep hill, only to ride all the way back down, turn around, and do it again. It was tiring enough just walking never mind riding up and down in the 35 celcius heat. I was sitting on top of one of the walls, looking down onto the beach.

To make the perspective work
I included the little 'ant' sized people on the beach, you can see some walking, others lying down. If you look really close you can see the details of their jewelry, clothing, eye colours etc. OK, I was just joking about the details. The colour of the water was this amazing teal green with cool blue, I achieved this in the painting by starting with a lighter green and overlaying the blue (french ultramarine).

Playa del postiguet (from castle), watercolour 5 x 7" cold press, 1998 (No. 0895)

Tuesday, June 3, 2008

Blue Flames Consuming the Stylized Image of a Woman (study)

This painting is a small study of a larger painting under the same title. I actually could not think of a good name for the work, and so came up with a kind of literal description 'Blue flames consuming the stylized image of a woman'. The larger work which is 22x30", was turned down by the gallery in London, to my dismay, and so I went home and changed it all around. I should put up the large version some day.

To make the fire, I used a combination of wet and dry techniques. First I blend different shades of blue together with some orange, and when it dries I drag a brush loaded with paint gently over the surface of the picture, creating the textured fire effect.

Blue Flames Consuming the Stylized Image of a Woman (study), watercolour 5 x 7" cold press, 2002 (No. 1678a)

Thursday, May 29, 2008

technology@pull

In this painting, strange alien-like people support or pull at each others arms while a sun sets over a calm sky. Silhouetted on the horizon is an old windmill suggesting a rural area. I suppose the premise of this work has to do with how technology can advance, pulling us in other directions as we still try to hold on to the old technology.

You may wonder how I created the halo of pink light around the tree line. When the sky was still wet, I put in a layer of red paint which 'bled' out into the tree shapes. When the red was just about dry I put in the darker browns of the tree. The trick is to know when the paint is just wet enough to add the next layer. Too wet and the second layer diffuses all over and you loose the shape, too dry and you can not get the delicate 'feathered' effect. The same trick was used to create the multi-coloured sky. It is all a matter of practice.

technology@pull, watercolour 7 x 5" cold press, winter 2007 (No. 1455)